How to Clean Your Dirty Tools
- Jun 8, 2020

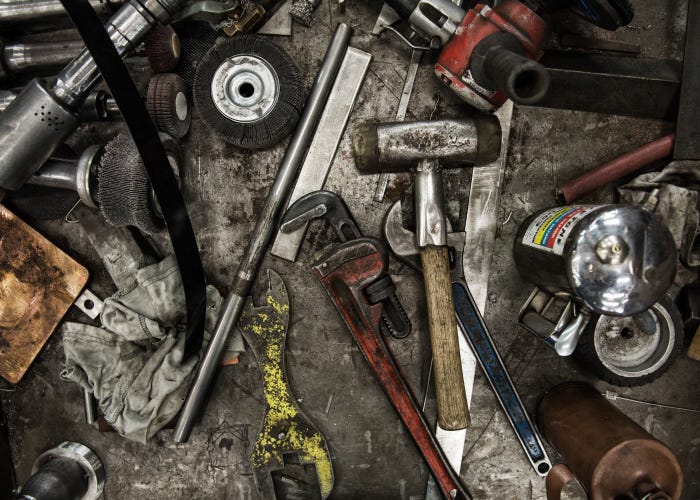
After many uses and applications, rusty or corroded tools are often thrown out with the assumption they can’t be fixed, cleaned, or reused again. In some instances, this may be true. But don’t throw out your tools just yet. Rust, even on the highest quality of tools, is common. Yet understandably it can be annoying to use tools that have succumbed to this process. Luckily there are ways to maintain and care for your tools on a regular basis that will leave them looking like new, even after multiple applications.
Tips for Restoring Rusty or Corroded Tools
Rust can form on materials made of iron and steel due to oxidation typically in the presence of moisture. Tools that fall victim to rust and corrosion may appear tough to clean at first, but there are several ways to do so. If your tools came with special instructions, it’s important to follow them accordingly. If they don’t come with cleaning instructions, it may be worth doing research on what others have successfully used to clean their tools without accidentally damaging their tools — their cleaning processes may have consisted of the following methods.
Sanding Rust and Corrosion
For tools that are lightly covered in rust, gently sand down the area with sandpaper or scrub with another tough surface such as steel wool, stiff wire brush, or a scouring pad. This method can be tedious, but it does help. Before sanding, you’ll want to completely clean your tool with a degreaser. If you notice that even after the initial cleanse and sanding there is still rust and corrosion, then your tool may require more intense cleaning. Once you have completed the sanding you will want to cleanse your tools once more and dry it thoroughly.
Vinegar and Baking Soda
For those tools with a more intense coating of rust, use a vinegar and baking soda mix, separately. This may sound strange at first, but the chemical composition of vinegar and baking soda is strong enough to break down the rust.
When using vinegar: Combine ¼ cup of salt per liter of white vinegar. Find a container that is large enough to fit the liquid mix and your tools. Pour enough vinegar to cover your tools, and sprinkle salt accordingly. As time goes on, check to verify that the rust is softening up and lifting. When you notice the rust is soft, remove any remaining corrosion with a wire brush or steel wool.
When using baking soda: Add baking soda to a bowl and add water until it makes a paste. Proceed to apply the paste to the rusted areas of the tool and let it sit for a couple of hours. After time passes, rinse off the paste composition with water and dry completely.
Oxalic Acid or Rust Remover
Oxalic acid is a rust remover that removes rust at a faster pace. Since it’s a chemical, it’s recommended that when using oxalic acid, you use safety gear such as rubber gloves and protective eyewear.
Oxalic acid can be purchased at your local hardware store. To use the solution, it’s recommended that you combine one gallon of water and three tablespoons of oxalic acid into a container that is large enough to cover your tools. It’s important to remember that since this is a chemical, you’ll want to mix the solution carefully to avoid splashing on yourself and the workspace around you. You’ll also want to wear protective gear to avoid any chemical burns.
Lemon Juice and Salt
This method may require more work, but it can help. The acidity levels in the lemon, combined with the coarse texture of the salt, create a solution that can remove thin layers of rust. Make sure to squeeze out as much lemon juice as you can in order to make the most out of your product. Let the solution sit on your tools for a few hours, then scrub with a wire brush or steel wool, and rinse and dry.

Tips for Cleaning Dirty Tools
Even if your tools aren’t at the stage of rust and are just dirty from everyday use, it’s still important to keep them clean after each use. This will help ensure their longevity and help you get the most out of your tools. To reiterate, you should follow the instructions that come with your tools to clean them. But for those that don’t have instructions and are only a little bit dirty you can do the following:
- Wipe your tool down with a rag;
- Wash your tools with soap and water (make sure to thoroughly dry to prevent rust);
- Lubricate your tools with a tool-safe oil to help prevent rusting.
Tips for Maintaining Tools
One of the ways your tools may experience corrosion faster than normal is because of improper maintenance. Not only will the following advice help to keep them clean, but it can also keep them in working shape for the foreseeable future.
Store Tools Properly
It isn’t a surprise that in order to properly upkeep your tools they should be stored appropriately when not in use. There are multiple ways to store your tools, for example:
- Hang your hammers, wrenches, and screwdrivers on a pegboard on the wall;
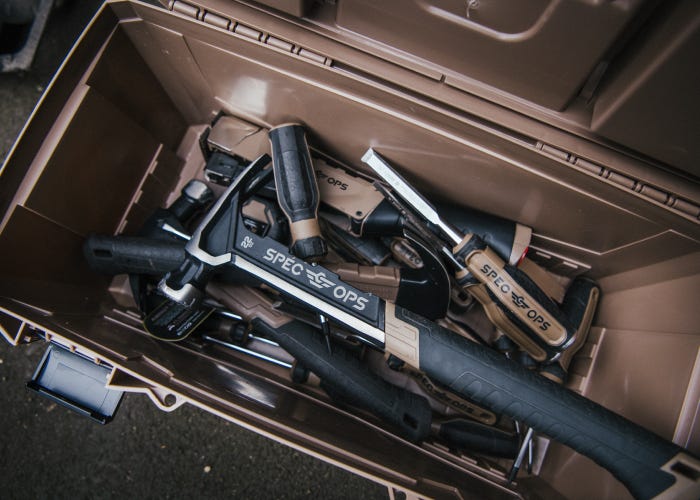
- Place them in a toolbox
- Store larger tools like pry bars and axes on a shelve away from moisture;
- Invest in a tool apron.
Storing your tools not only preserves them, but it also helps to ensure that no one gets harmed from leaving them out (accidentally getting cut by a sharp-edged tool, dropping a hammer on your foot, stepping on a screw, etc.).
Keep Tools in a Dry Place
Humidity and moisture can have a negative effect on your tools and may also promote the development of rust or corrosion. By placing them in a storage area that is free from moisture, it can help prevent these negative effects from happening.
You can determine the moisture levels in a room by investing in an indoor humidity monitor. The lower the humidity percentage, the better. These monitors track the levels of humidity in a room and can be purchased at your local drug or hardware store.
Regularly Inspect and Repair Tools
Even if you don’t utilize your tools daily, it doesn’t mean that you shouldn’t inspect them regularly for dirt, damage, and rust. It’s a fairly easy process to inspect them and depending on the number of tools you own, it can take little time to complete. Some tools will need further inspection beyond dirt and rust, for example, inspecting your framing hammer grip for tears or electric drills for missing screws. If you notice the tool has damages beyond repair, then it may be in your best interest to turn to your trusted tool retailer for a replacement.
Here at Spec Ops Tools, we cover any hand tool for the lifetime of the product. Learn more information about how to replace your tools with our limited lifetime warranty.