A Guide to the Different Types of Hammers and How to Use Them
- Jun 8, 2020

Famed conductor of 1896’s “The Stars and Stripes Forever” John Philip Sousa once said, “You can’t drive a spike with a tack hammer.” While Sousa was speaking metaphorically, this underscores a literal truth for all contractors and DIY enthusiasts: You need to have the right tool for the job.
However, choosing the right hammer for your task can be a daunting prospect. There are dozens of different kinds and using the wrong one can lead to shoddy workmanship or, worse, personal injury. This guide will provide an extensive look at the most common types of hammers you should keep on hand and how each should be used in the jobsite.
The Most Common Types of Hammers and Their Purpose
There are many types of hammers. Each is constructed differently and is used in different ways. It’s important to understand these differences in order to work in a safe and efficient manner.
Note that this guide will not include every type of hammer. Many types of hammers are suited to highly specific use cases within certain professions. For instance, a blacksmithing hammer is used for metalwork, so it’s unlikely to find its way into a general contractor’s or DIY enthusiast’s toolkit.
Instead, this article will focus on hammers that suit a variety of purposes and that see more widespread use — particularly when it comes to contract work and home improvement projects. Let’s take a look at the different types of hammers:
Ball Peen Hammer
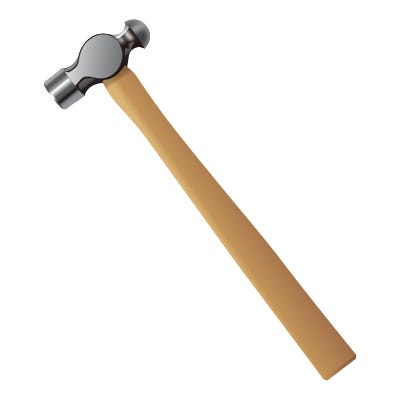
Also known as a machinist’s hammer, a ball-peen hammer is identifiable by its two heads: a round one and a flat one. Though this tool is traditionally used in metalworking, it can also be used to strike punches and chisels, as well as round off edges on rivets.
Brick Hammer
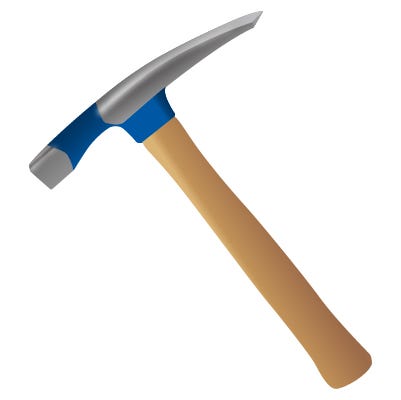
A brick hammer, often referred to as a stonemason’s hammer, has a flat face with a distinctive chisel-like blade on the other end. As the name suggests, this tool can be used to break off pieces of brick, stone, or concrete. Brick hammers are often made with high-grade steel heads and fiberglass or hardwood handles.
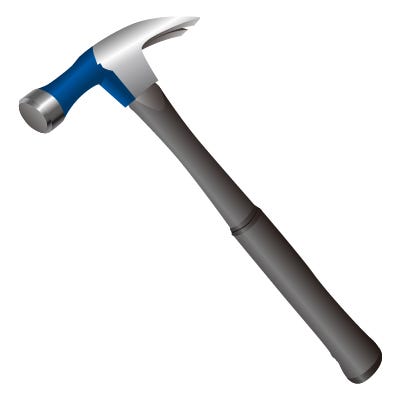
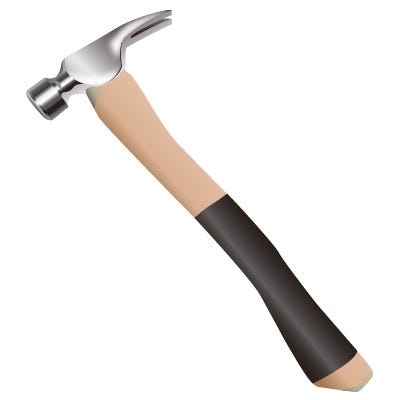
Claw Hammer
One of the most common types of hammers, a claw hammer is used to drive or pull nails from objects. It can be identified by its flat head and namesake claw. Claw hammers are generally not suited for heavy hammering like ball peen hammers are.
Claw hammers are often forged from softer steel alloys. High-quality claw hammers are made of fiberglass, such as our 16 ounce and 20 ounce fiberglass nailing hammers. Alternatively, the hammer may be forged as one piece, where the body and head of the hammer are made of the same material.
Some claw nailing hammers will have a waffle-faced head, while others will have a smooth one, such as our 20 ounce smooth face nailing hammer. The former is useful for increased accuracy, but it can leave an imprint of your hammer on the surface; a smooth driving face will generally not do this.
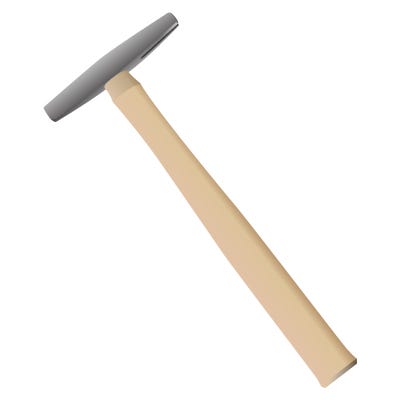
Drywall Hammer
This type of hammer has a serrated front face and a small hatchet-shaped back section. A drywall hammer, also commonly called a plasterboard hammer, is a lightweight straight peen hammer used to make cuttings in drywall. This is useful to make space for electric outlets, for example. It can also be used to drive or pull nails into drywall.
Electrician Hammer
An electrician hammer looks and handles nearly identical to a claw hammer. However, it is constructed with an insulated fiberglass handle and a rubber-coated grip, which allows it to be used for electrical work. It also has a longer striking face, which helps contractors do work in tight areas.
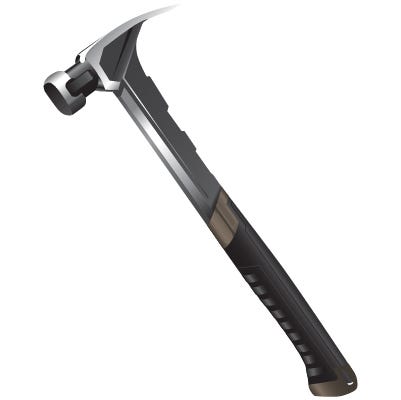
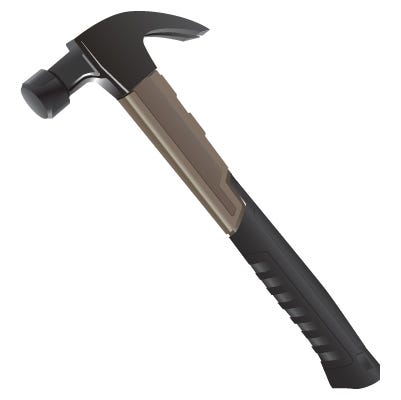
Framing Hammer
This is a specialty claw hammer that is about twice as heavy as a standard claw hammer. While a standard claw hammer weighs up to 16 ounces, a framing hammer can weigh up to 32. Our milled face framing hammer weighs in around the middle, at 22 ounces. This weight, along with its waffled striking surface, allows contractors to drive nails quickly without them slipping.
Sledgehammer
A sledgehammer can be used to drive stakes or do demolition work. They have long handles — between nearly 2 feet to just over 3 feet — and have heads up to 20 pounds in weight. They most commonly have wooden handles, though they may be made with fiberglass as well.

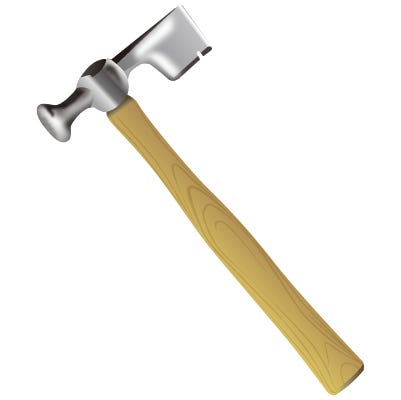
Tack Hammer
Also known as an upholstery hammer, a tack hammer is a lightweight tool for driving upholstery into furniture or surfaces. Most tack hammers have two faces, with the split side being magnetized to help users place tacks accurately.
Trim Hammer
Similar in size and weight to a tack hammer, a trim hammer is simply a small, straight claw hammer that can be used to drive trim nails without damaging anything in the work area.
Parts of a Hammer
Although there are many types of hammers, every hammer is constructed with the same main parts, all of which are important to the design and use of each hammer. Every time you use a hammer, you're gribbing the handle, making this the most improtant part of a hammer. The length of a handle is determined by how much force is needed from the impact of a hammer face. So, what part of the hammer does most of the work? The head. Varying in weight, the head gets the job done everytime. Part of the head, the face is what strikes nails and other materials. Mostly used for pulling nails and acting as a pry bar, the claw can be designed as cruved, straight or rip. The part of the hammer that holds it all together? The cheek. It also receives the most stress and can be the weakest point in some hammers. Connecting the handle to the head is the neck of a hammer, which also provides balance to the tool as well. Unlike the human head, a hammer's eye is located at the bottom of the hammer's head.

Factors to Consider When Choosing a Hammer
There is a wide range of factors to consider when choosing a hammer. This includes determining your price point, understanding the differences in the performance of various materials, and considering the reputation of the brand.
Price
It can be easy to let your budget get out of hand when attempting to buy the best of the best in tools. In a rush to flesh out your toolkit as soon as possible, you could find that your ability to afford the materials you’ll need to complete projects may be compromised.
Ultimately, you get what you pay for. Be wary of tools with suspiciously low prices. These may be produced without enough quality control or with cheap, flimsy materials. They may also be counterfeits, complete with fake branding. The limited durability of such tools makes them unlikely to see use for long, assuming they are even fit for the task at hand.
While the cost of any given project may be an immediate concern, investing in the right tools upfront can keep you prepared for many more projects to come. A quality hammer, properly used and maintained, can pay for itself many times over compared to shoddy hammers that don’t outlast the projects you use them to complete.
Materials
Examples of reliable materials are high-carbon steel, fiberglass, and titanium. These generally absorb the impact of repeated strikes and are durable. Examples of unreliable materials are steel with high iron content and wooden handles, which can become fragile over time.
Again, while tools made of unreliable materials may be cheaper, the more durable alternatives are often worth it. After all, if you need to replace a hammer every couple of years due to poor workmanship, are you truly saving money in the long run?
Note, however, that the level of quality you need often depends on the purpose of the hammer. Hammers that are used to drive in or break up materials should be made from highly durable materials, while those designed for light work may be made out of copper, wood, or even plastic.
In addition to keeping an eye out for high-quality materials, note that some projects may require specific additions. For instance, if you need to apply force with a softened strike, you might use a milled face framing hammer or a smooth face nailing hammer with a rubber mallet cap. Understand these requirements while shopping to avoid causing damage later.
Brand
Brands that produce tools have reputations to uphold — and their reputations hinge on the quality of their products. Choosing to buy a hammer from a veteran-owned company could be a smart move, as it improves the chances that you’ll be getting a tool that will last for many years. Certain brands offer better manufacturer warranties than others, which is an important consideration for hammers. We cover any Spec Ops branded hand tool for the lifetime of the product.
In addition to this consideration, many brands support specific causes. By supporting these brands, you may also be providing support to people on issues that matter deeply to you. Spec Ops Tools is a prime example, as we have a strong commitment to veterans and donate 3% of our proceeds to veteran and first responder causes.
Best Practices for Using a Hammer
Many injuries are caused by a lack of simple know-how when it comes to hammer use. Indeed, nearly 120,000 injuries occur each year in the U.S. due to improper workshop manual tool use, and experts estimate that about 30,000 of these are due to hammer accidents specifically. Follow the best practices outlined below to avoid becoming a part of this statistic.
How to Use a Hammer
Here are some general best practices for hammer use:
- Before getting started using a hammer, ensure it is suitable for work. If the tool has obvious signs of degradation, such as a loose head, patches of rust, or splintering wood, do not continue to use it — it may break on impact and cause injuries.
- Be sure to invest in some safety eyewear. While it may seem unlikely, it’s not uncommon for nails or other objects to fly toward you while you are hammering.
- When you are using a hammer, stay absolutely focused on the task at hand. Multitasking is off-limits. If you become distracted during work, you may cause damage to property or to yourself.
Let’s discuss how you should swing a hammer. First, look over your shoulder to ensure that no person or object will be endangered when you start working. Next, wrap your hand around the grip of the hammer, positioning your thumb on top of it; this gives you greater control over your swings. Keep a firm grip on the tool so that it will not fly out of your hand, then line up the hammer with the item you’re hitting. Start with a gentle tap, then increase your power once the item is set in place. You should be able to drive the item with moderate force. Our line of hammers feature a ballistically balanced design for maximum striking power and a bi-material shock-absorbing grip for ultimate control and vibration reduction to help lessen the impact on joints over time.
Note that how you swing your hammer will vary slightly from type to type, but these are some general concepts that you should remember, regardless of which hammer you’re using.
How to Properly Store Hammers
If you want to make the most of your investment into your new tools, you must store them properly. Tool degradation can be largely avoided by using a proper storage solution.
Keep your hammers on a hammer rack or in a toolbox in an area with limited moisture, as this may lead to rust. A dehumidifier can also be used to remove moisture and preserve your tools for as long as possible. You can also use moisture-absorbing silica gel packs to keep moisture at a minimum.